
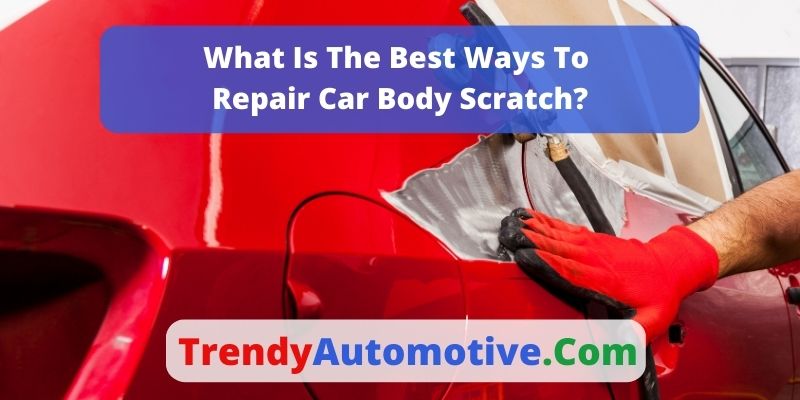


Are you looking to repair a car body scratch? It’s important to do the job right and make sure your vehicle looks as good as new. As an automotive body repair expert, I understand how daunting this task can seem – but don’t worry! In this article, I will provide detailed information on what is the best way to repair a car body scratch. With my expertise in automotive body repairs, I’ll guide you through understanding why certain methods are more effective than others and how to get the best results for your project. So let’s get started!
Definition And Types Of Car-Body Scratches
“A stitch in time saves nine,” goes the old adage. This is true when it comes to car-body scratches, as catching them early and repairing them can help avoid more costly damage later on. Car-body scratches come in various shapes and sizes; understanding their types and severity of damage can help determine how best to repair them.
The most common type of car-body scratch is surface scratching, which occurs when a sharp object hits the paint or clear coat. Depending on the depth of the scratch, this type of damage can generally be repaired with some light sanding and repainting. Deeper gouges that break through to bare metal require grinding down to remove rust before refinishing with primer, new paint, and a fresh layer of clear coat.
Scratches caused by environmental conditions such as acid rain are known as etching marks. If left untreated these deep pitting marks will eventually erode away at paint layers leading to corrosion beneath the surface. To prevent further deterioration from occurring special compounds need to be applied prior to applying touch up paint followed by a topcoat for maximum protection against future weather exposure. With proper care these repairs should last for years if not decades depending on climate conditions where you live.
In order to accurately identify what kind of scratch has occurred it’s important to first understand its cause; ensuring timely repair can save hundreds if not thousands in restoration costs down the line.
Causes Of Car Body Scratches
Car body scratches can be caused by a variety of factors. Weather damage, such as hail or strong winds, is one common cause. Road debris, like gravel and rocks that are thrown up from other vehicles, can also lead to scratches on the car’s paintwork. It’s important to identify the source of the scratch when assessing repair options.
Many times the surrounding area will have been damaged too, which can require additional work for complete repairs. In some cases there may even be rust or corrosion around a scratch where water has seeped in beneath the surface. Knowing what you’re dealing with is essential before beginning any kind of repair project.
To ensure an effective repair job it’s crucial to carefully inspect all areas affected by car body scratches prior to starting any work.
Pre-Repair Inspection
A pre-repair inspection is an essential step when it comes to repairing car body scratches. A thorough assessment of the scratch should be done before starting any repair process. This will help determine how much work needs to be done, what materials are needed, and provide a clear evaluation of the damage.
When assessing a car’s body damage from a scratch, there are five key elements that must be inspected:
- Paint integrity – inspect for cracks or chips in paint around the scratch
- Depth of scratch – measure depth with calipers or ruler if possible
- Width of scratch – again use calipers or ruler if possible
- Contour of surface – check for raised edges surrounding the scratch
- Cleanliness – any visible dirt or debris on/around the area must be removed
Having all this information will allow technicians to effectively develop a plan for body repair and choose appropriate materials accordingly. Without performing proper assessment, repairs may not last long-term which could result in costly rework. Therefore, it’s important to take your time while conducting an initial inspection so you get accurate results. Moving forward, cleaning the area is necessary prior to making any repairs.
Cleaning The Area
Cleaning up a car-body scratch is like taking on an art project – it requires precision and care. To start, you’ll need to clean the area around the scratch for surface preparation. To do this, use warm water with detergent or soap and a soft sponge or cloth. Wipe away any dirt, debris, or oil residue that has collected in the area of repair. Rinse the area well afterwards so no particles remain. After cleaning, allow the car body to dry completely before proceeding to the next step: removing paint bubbles.
Removing Paint Bubbles
When it comes to car body repair, paint bubbles can be a nuisance. Removing these is an important step in the process of repairing scratches on your vehicle’s exterior. To get started with paint-bubble removal, you’ll need to use a heat gun or hot air blower to soften and loosen the surrounding area. It’s essential that you take caution when doing this, as too much heat can damage the existing paint job. Once the bubble has been softened, you’ll want to carefully scrape away any excess material until only the bare metal remains exposed.
To ensure a successful bubble-removal process, it’s important to use tools specifically designed for automotive work. This includes items such as wire brushes and sandpaper, which will help remove rust from the affected area before primer application begins. Additionally, if there are multiple bubbles present in one area, take extra care when scraping them all down so as not to create further damage by overworking one spot more than others. Following these tips should give you good results!
Once all bubbles have been successfully removed from the surface of your car body scratch repair project, apply some light pressure with a lint cloth to check for remaining bumps or irregularities. If everything looks smooth and even then it’s time to move onto applying primer – which is essential for protecting against future corrosion and providing a strong base layer on which new paint can adhere properly.
Applying Primer
Once the paint bubbles have been removed, it is time to focus on repairing any scratches in the body of the car. Applying primer can provide a smooth surface for painting and help protect against further damage or corrosion. Primer acts as an adhesive, helping paint adhere to the car’s body and making sure that the finish looks seamless. Just like how a blank canvas awaits its artist, applying primer gives your car a clean slate for you to work with.
When choosing a primer for scratch-repair, look for one specifically designed for automotive use. Car-body primers usually contain zinc chromate to prevent rust from forming under your new coat of paint. Make sure you are using an aerosol spray that comes out at even pressure so there are no splotches or uneven patches when coating the area around the scratch. Start spraying about 8 inches away and move closer slowly until you reach 4 inches away before moving onto another section; this will create an even layer over top of everything else on your car’s bodywork.
The next step after applying primer is sanding down the surface so that all areas are completely level before painting takes place. This ensures that whatever color your choose goes on evenly without leaving behind bumps or ridges due to air bubbles in between layers of paint. Sandpaper also helps remove any remaining imperfections left by scratches or chips in order to make repairs nearly invisible once complete!
Sanding Down The Surface
Sanding down the surface of a car scratch is an integral part of repairing it. The sanding technique used, as well as the materials and tools employed for this process will determine how successful the repair job turns out to be.
To begin sanding the damaged area, start with a medium-grit wet/dry sandpaper. Always make sure that you use a clean piece when you’re ready to move up in grit levels; otherwise, particles from the previous grit can get lodged into your paintwork and create more damage than good. Wetting your paper before use also helps reduce scratches on the paint surface while providing better control to avoid wasting time or material. Work slowly over the affected area until all irregularities have been evened out, then switch to finer grades of paper. Use progressively finer grades until you reach 1000-2000 grit level; any higher may cause too much sheen if not buffed properly afterwards.
The type of sanding tool should depend on how large or small the repair job is. For larger areas, power sander machines are best since they cover ground faster than manual ones do – just remember to keep those moving at low speeds so as not to burn through your workpiece! If you’re dealing with smaller projects however, electric rotary tools such as Dremels provide precision along with variable speed settings which allow for greater control when working around curved surfaces and details. Whichever tool you choose, always bear in mind that safety comes first – protective gear like masks and gloves must be worn whenever using these devices!
With proper preparation complete and adequate protection taken care off, you can now proceed with filling in the scratch with putty.
Filling In The Scratch With Putty
The next step in repairing a car body scratch is to fill it with putty. Allusion can be made here to the time-honored tradition of ‘filling and sanding’ – an age-old practice used by automotive enthusiasts and professionals alike. Here’s what you’ll need:
- Car body putty
- Putty knife or spreader tool
- Repair putty
Begin by cleaning the surface around the scratch, using soap and water or a degreasing solution. Once clean, apply a thin layer of car body putty over the entire area where the scratch was located. With your putty knife or spreader tool, smooth out any lumps or bumps that may have formed during application. Allow the putty to dry for at least an hour before proceeding further.
Once dry, use some repair putty (also known as spot filler) to cover any remaining depression from the scratched area. Again, you will want to work slowly with your knife or spreader tool until all surfaces are flush once more. Now you are ready for touching up with paint!
Touching Up With Paint
Touching up with paint is an essential step to repair car body scratch. For best results, it’s important to use auto-body paint and a touch-up painting kit that matches the original color of your car. Start by cleaning the area around the scratch, then apply primer if necessary. After the primer has dried, begin filling in the scratches using a small brush or sponge applicator provided in most touch-up kits. The goal is to fill in all scratches as much as possible before adding any additional layers of paint. Once you’re satisfied with how well you’ve filled in each individual scratch, add one thin layer of car-paint repair material over them all for a uniform finish. With practice, this process can be completed quickly and effectively without professional help.
The next step after touching up with paint is polishing the affected area so that it blends seamlessly into its surroundings.
Polishing Process
Polishing a car scratch is like working on a painting; the technique and tools used can make all the difference in achieving an even finish. As with any repair, it’s important to use the right materials for best results. Car-polishing involves using polishing compounds designed specifically for auto paint finishes, as well as special cloths and buffers that won’t damage the clear coat of the vehicle.
The process begins by cleaning off dirt or debris from around the scratches before buffing them out. A good quality cutting compound should be applied first, followed by a finer polishing compound to bring out a high gloss shine. The compounding process will take some time and patience, but it’s worth it to get rid of those unsightly scratches. It may also help to mask minor imperfections such as swirl marks left behind after washing or waxing your car.
After polishing, apply a protective layer of wax or sealant to protect against future wear and tear. This extra step will keep your car looking great while helping prevent further scratching down the road. With careful application of these techniques, you can restore your car’s original beauty without having to spend too much money at a body shop. Transitioning smoothly into the next topic – diy repair methods – knowing how to properly polish away scratches is one way you can save yourself time and money on repairs in the long run!
Diy Repair Methods
DIY repair of car body scratches is a great way to save money and get the job done right. Here are some helpful tips and steps for repairing your car’s body:
- Gather all necessary materials, including sandpaper, painter’s tape, primer, paint, rubbing compound, wax and polish.
- Make sure the area you plan to fix is clean and free from any dirt or dust; wash it with soap if needed.
- Sand down the scratch until it is smooth then dry off any excess moisture before applying primer and painting over the damaged area.
- Once the paint has dried completely, use rubbing compound to blend in the new paint color with the original finish on your vehicle’s bodywork.
- Finish up by buffing out minor imperfections with wax and polishing for an even shine.
By following these DIY repair steps, you can have a perfectly repaired car body without having to pay for professional services.
Professional Repair Services
When it comes to car-body repairs, professional services are often the best option. In some cases, DIY repair methods may be enough to fix a scratch, but for more serious damage, specialized equipment and expertise is usually required. Professional body repair centers are equipped with the tools and materials needed to restore your vehicle’s surface back to its original condition.
The cost of having a professional scratch repair done will depend on several factors such as the type of paint used in your car, how deep the scratch is, and other variables. It pays to shop around and compare prices from various auto shops before making a decision. A reputable body shop should be able to provide you with an estimate prior to beginning any work so that you can make an informed decision about what makes financial sense for you.
In addition to price considerations, it’s also important to consider quality when selecting a mechanic or body shop for repairs. Many professionals have certifications indicating their level of skill in automotive maintenance and repair which can help ensure that they know exactly what they’re doing when working on your vehicle. Taking time to research different options and read reviews online can help lead you towards choosing someone who is experienced in fixing scratches correctly without damaging your car further. With careful consideration, you can find reliable experts who will do a great job repairing your scratched car at an affordable price.
Cost Considerations
The cost of repairing a car body scratch depends on the severity and location. If you are considering taking your vehicle to an auto-body shop, it could be expensive depending on the extent of damage. Alternatively, if you have basic tools and experience with DIY repairs, then it is possible to repair minor scratches without incurring large costs.
When looking at car-repair costs, body shop repairs usually involve repainting or replacing parts which can be quite expensive. On the other hand, DIY repairs generally require fewer materials and only need sandpaper, primer, paint and clear coat for most jobs. This makes it more affordable than going to a professional body shop.
Finally, when deciding whether to go with a professional service or do it yourself, consider both time investment and cost. If you don’t feel comfortable performing a repair yourself then you may want to opt for a higher priced but quicker solution from an experienced auto-body specialist. Otherwise diy-repairs offer great savings in terms of money if done correctly. Transitioning into preventive measures for future damage requires thorough knowledge of how best to prepare surfaces before applying any type of coating or primer – this will help ensure that any scratches made in the future won’t show as easily as they would otherwise!
Preventive Measures For Future Damage
Preventing future damage to your car is paramount. To protect your vehicle from scratches, regular washing and waxing are essential. This will help keep a protective coat on the paint of your car which helps prevent dirt and debris buildup that can cause scratches. Additionally, do not use harsh chemicals when cleaning your car as they may strip the sealant or wax applied to the paint job.
Cleaning off salt and other corrosive substances should also be done regularly during cold winters or if you live near an ocean shoreline. Salt corrodes metal surfaces faster so it’s important to wash away this substance after each rainstorm in order to avoid any potential rust spots forming over time.
Finally, parking under trees with sap dripping down onto cars is something best avoided since it too can lead to scratches upon contact with its sticky residue. Taking these preventive steps now can help ensure that no additional repairs will be needed for some time.
Post-Repair Maintenance
After repairing a car body scratch, it’s important to take care of the newly-repaired area. Proper post-repair maintenance can help keep the freshly painted area looking flawless and ensure that the repair lasts for years to come. Here are some tips on how to maintain your vehicle after a paint job.
First off, protecting your car’s paint is key in preventing future scratches or damage. Waxing your car regularly helps protect against dirt and dust accumulation, while also adding an extra layer of protection from UV rays which can cause fading over time. It’s also wise to park in shaded areas whenever possible – this will prevent sun exposure from causing any premature aging of your car’s finish.
Second, always be mindful when around other vehicles or objects that could potentially cause damage with contact. This includes parking away from shopping carts at stores or keeping a safe distance between you and cars in traffic jams. Additionally, if you need to clean debris such as bird droppings or tree sap from your vehicle, avoid using harsh chemicals that might strip away wax coating and damage the freshly repaired surface. Instead opt for soapy water or specialized auto cleaners designed specifically for removing contaminants without harming paint finishes.
Finally, regular inspection of the car body should be done periodically – especially if living near heavily trafficked roads where there may be more potential sources of scratching and chipping due to road debris kicked up by passing vehicles. These inspections allow you to catch any small issues early before they become bigger problems down the line; thus allowing you to address them quickly with minimal effort needed compared with having to perform more extensive repairs later on due to neglecting minor details now!
Frequently Asked Questions
What Tools Are Necessary For Diy Car-Body Scratch Repair?
When it comes to DIY car-body scratch repair, the right tools are essential. Without the correct equipment, you won’t be able to efficiently address any imperfections in your paint job or bodywork. Whether you’re a novice or an experienced automotive body repair expert, here is what you need to know about the tools required for successful car-body scratch repair.
The first tool every do-it-yourselfer should have on hand when attempting car-body scratch repair is sandpaper. Sandpaper provides the perfect surface upon which to apply various types of filler and primer materials used during repairs. Additionally, sanding helps create a smooth finish that will look great once all other repairs have been completed.
Another important tool for diy car-body scratch repair is a buffing machine. A buffing machine can help remove scratches and other damage from cars’ painted surfaces without having to use harsh chemicals or abrasive material such as steel wool. The final step in any car-body scratch repair process should involve waxing and polishing, which requires a buffer or similar power device designed specifically for this purpose.
By familiarizing yourself with these key pieces of equipment and using them properly, anyone can achieve professional results when repairing their vehicle’s minor scrapes and blemishes at home. With just a little effort and some basic knowledge about car-body scratch repair tools, everyone has the potential to restore their ride back to its original glory!
How Can I Tell If A Professional Repair Service Is Reliable?
When it comes to getting a reliable, professional repair service for your car body scratch, it’s important to do your research. Take the time to look into reputable repair services and ensure they offer quality work. To help you get started on finding a trustworthy service provider, here are some tips:
• Check online reviews – Reviews from past customers can provide insight into the quality of an auto body shop’s work. Look for comments related to customer satisfaction with the final product as well as how long repairs took and if any additional problems occurred during the process.
• Ask around – Talk to friends or family who have had their cars repaired recently and ask them about their experience. Additionally, join forums devoted to car enthusiasts and ask questions in these communities regarding which shops they would recommend based on personal experiences.
• Visit the shop in person – It is always best practice to visit prospective auto body shops in person before committing to having repairs done there. Get a feel for the place by looking at past projects completed by the shop technicians—this will give you an idea of what kind of results you can expect when you leave your vehicle behind with them. Also use this opportunity to talk with staff members and see how knowledgeable they are; this may be indicative of how much attention will be given to repairing your particular issue(s).
In addition, make sure that any potential repair providers guarantee their labor so that should anything go wrong after leaving the facility, you know you won’t have additional costs down the road. A good way to protect yourself further is asking whether or not parts used are backed up by warranties from manufacturers or distributors—if something breaks within a certain period following repairs being made, then those parts can be covered under warranty instead of coming out of pocket again for more fixes or replacements.
To sum up, researching professional repair services before committing is key in ensuring that you find one that is both reliable and reputable for your car-body scratch repair needs. By taking advantage of available resources like reviews from peers and visiting shops firsthand, you’ll end up making an informed decision that serves all parties involved well!
How Long Does A Car-Body Scratch Repair Typically Take?
When it comes to car-body scratch repair, one of the most common questions asked is how long does this process take? To provide a reliable answer, we need to account for several factors. The type and severity of the damage, as well as the tools available and skillset of the technician will all have an impact on the length of time it takes to complete a car-body scratch repair.
The first factor that affects repair duration is the extent of the damage. Obviously larger scratches or dents require more work than smaller ones. For example, a single deep scratch may require sanding down, filling in with new material, smoothing out and repainting; these steps alone can take anywhere from 1-3 days depending on how much attention has been put into each step. On top of that additional parts such as bumpers are often replaced which adds even more time to the timeline.
In addition to size and depth of the scratch, other factors influence repair duration estimates. These include access to specialized equipment like paint booths or body shop tools, availability of replacement components or materials needed for repairs, and finally experience level of technicians performing repairs. A repair job done by someone who’s had years of practice versus someone just starting out might take drastically different amounts of time due to efficiency levels gained through experience.
Considering all these elements together makes it difficult to give an exact estimate without seeing what needs repairing but generally speaking car-body scratch repairs should range somewhere between 1 day up to 3 weeks depending on individual circumstances mentioned above. Ultimately when looking at any kind of automotive service its best to consult professionals directly so they can give you an accurate assessment based upon your specific situation and vehicle model.
What Is The Difference Between A Putty And A Primer?
Putty and primer may seem similar at first glance, but they have a world of difference between them. As an automotive body repair expert, I can tell you that these materials are not interchangeable – each is essential for producing top-quality results when repairing car body scratches. Let me explain the crucial differences between putty and primer so you know how to use them properly in your repairs.
Putty is used as a filler material after sanding down any damage on the car’s surface. It has a thick consistency which makes it ideal for filling larger gaps or covering deep scratches on metal surfaces. Putty also helps smooth out imperfections such as dents or chips while adhering well to most substances, including paint and plastic parts. On the other hand, primers create an even base layer before applying fresh new coats of paint over damaged areas. Primer acts like glue; it bonds with existing layers and creates a strong foundation before adding more color or polish to freshen up the exterior look of your vehicle.
Utilizing both putty and primer correctly will give you better results than using one alone would achieve. When applied together, putty ensures that all flaws in the car’s skin are filled completely, while primer gives pristine coverage across wide swaths of area where coatings need to be replenished or changed altogether. With this combination, you’ll end up with perfectly repaired car body scratch sections without any patchy spots visible from afar!
So if you’re looking to get quality repairs done quickly and efficiently, make sure to pick up some good quality putty and primer so you can start tackling those tough projects today!
Are There Any Environmentally Friendly Paint Options Available?
When it comes to repairing car body scratches, eco-friendly paint is a great option. Not only does it provide an aesthetically pleasing finish, but also the benefits of using non-toxic and water-based paints are numerous. Here’s what you need to know about these types of paint:
Firstly, eco-friendly paint is made from natural ingredients like soybean oil or citrus extracts. This means that there are no harmful toxins present in the product, making it a safe choice for DIY repairs as well as professional work. Additionally, these paints tend to be much more affordable than their conventional counterparts due to their lack of harsh chemicals and preservatives.
Secondly, eco-friendly paint options come in a variety of colors and finishes so you can easily find one that fits your needs. The majority of them are designed with durability in mind so they won’t crack or flake over time like some other products might. In addition, many water-based paints dry quickly once applied which makes them ideal for quick fixes and touchups as needed.
Finally, when selecting an appropriate eco-friendly paint option consider its VOC content (Volatile Organic Compounds). VOCs are harmful pollutants emitted by certain substances such as paints and solvents that can cause respiratory issues if breathed in regularly. Fortunately, most modern non-toxic paints have very low levels of VOCs so they’re considered relatively safe to use indoors without risking health concerns.*
*Here’s a list of 3 things to look out for when choosing an environmentally friendly paint:
- Natural ingredients used
- Durability & resistance against cracking/flaking
- Low levels of VOC emissions
As an automotive body repair expert I would highly recommend considering one of these eco-friendly alternatives when looking for ways to fix up minor scratches on your vehicle’s exterior surface – not only will you get excellent results with minimal effort required but you’ll also be doing your part in helping the environment!
Conclusion
The car-body scratch repair process can be daunting, but with the right tools and a bit of know-how, it doesn’t have to be intimidating. Knowing what kind of putty or primer to use and how long the repair will take are essential for successful DIY repairs. For those who prefer professional help, there are reliable services available that offer environmentally friendly paint options.
At the end of the day, repairing scratches in your car’s body is a time consuming yet rewarding task. With careful consideration and attention to detail, you’ll be able to restore your vehicle back to its original shine in no time at all! Whether you’re tackling this project yourself or opting for a professional service provider, I’m sure you’ll find that fixing up your ride has never been easier – or more satisfying!
So if you want to bring out the best in your automobile’s exterior appearance, don’t let pesky scratches get in the way. Put together an effective plan of action and get ready to revitalize your ride with some quick and easy car-body scratch repairs!